Preserving Lightroom edits while migrating to Photos.app
I’ve been a Lightroom user for a number of years, without ever really taking advantage of its advanced features. When Apple unveiled Photos, it looked just about perfect for my use.
There are some things I miss, but having my entire library on all devices is an absolute killer feature - Lightroom is no longer installed on my Mac.
The Problem
I capture all my pictures in RAW format (using my awesome Olympus EM10) then frequently tweak them afterwards on my laptop. This means I had hundreds of files with non-destructive changes stored inside my Lightroom catalogue.
I wanted to migrate without losing these edits, but at first glance it seemed my only choice would be to discard them and start again. Turns out there is a simple way to keep edited copies side by side with my originals inside Photos.
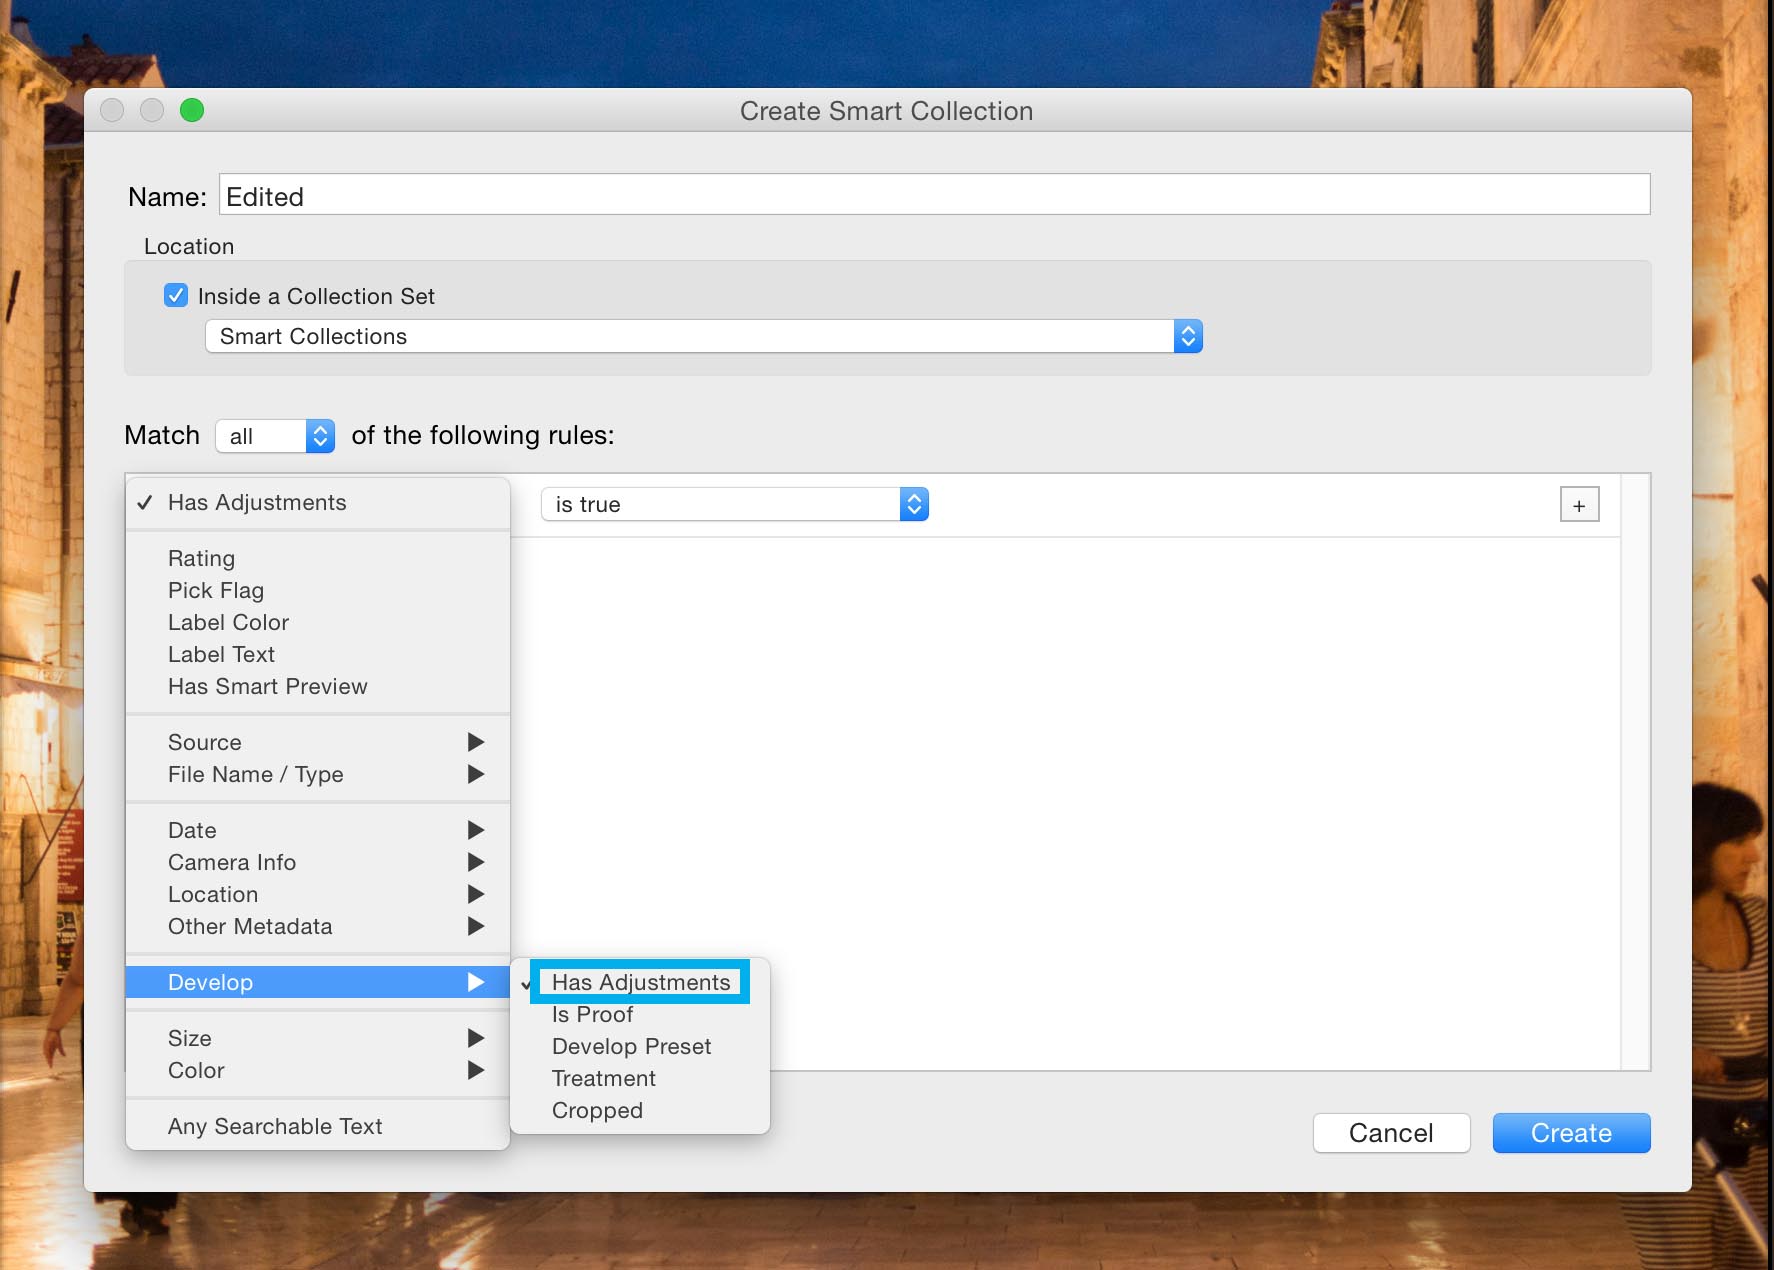
Exporting edits using a smart collection
The first step is to use Lightroom to export a JPEG version of each edited picture with the changes baked in. Finding them all sounds like a daunting task, however smart collections come to the rescue here:
The rule Has Adjustments: is true will collate all edited photos into a single view.
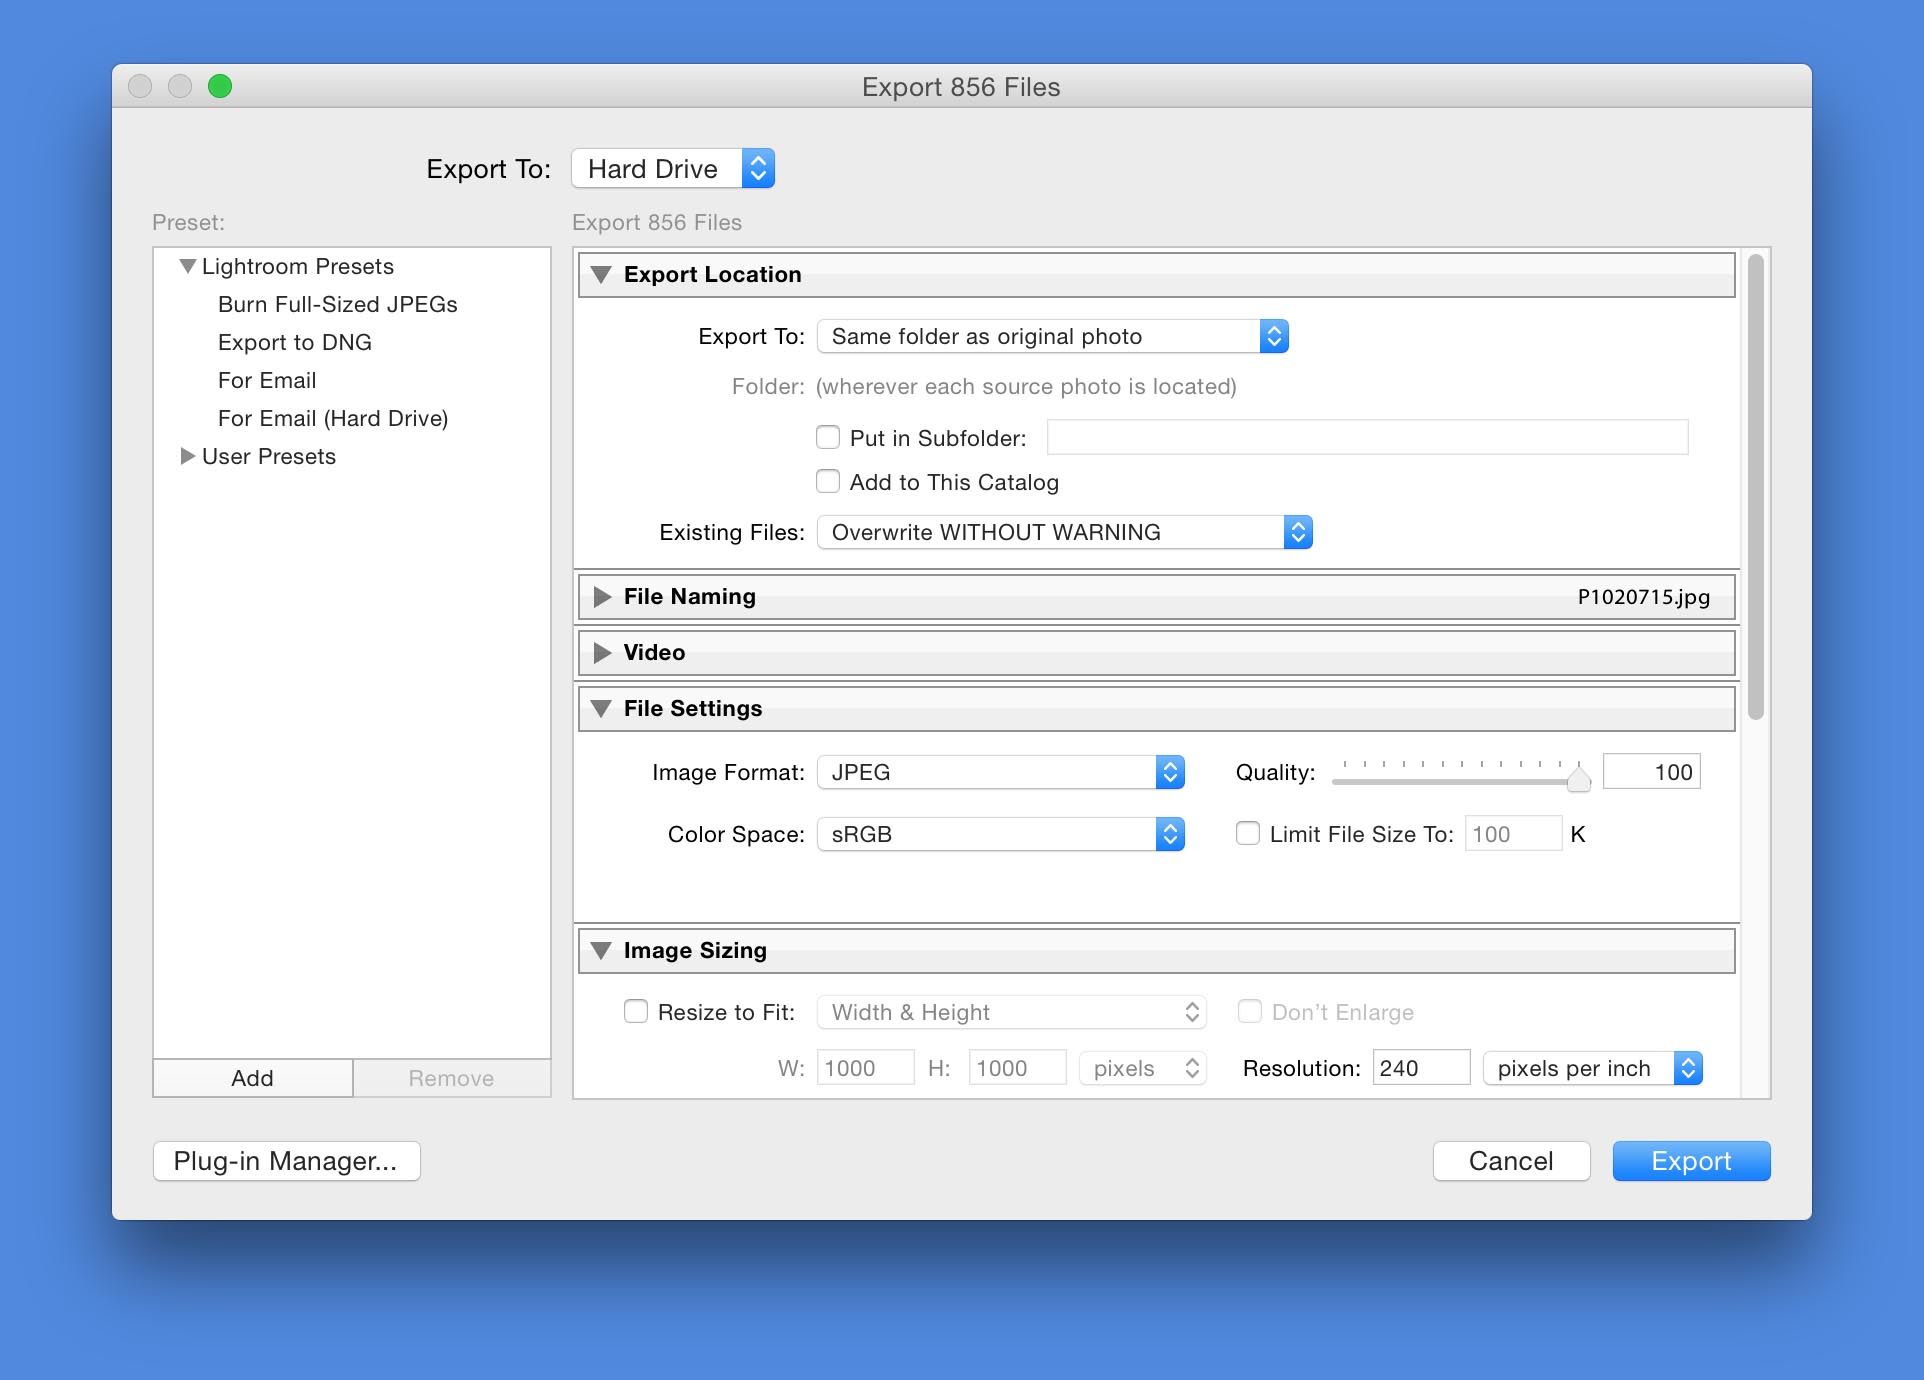
After that, a quick Edit -> Select All in the grid view, followed by File -> Export with the settings below will place an identically named JPEG in the same folder as each original.
Inside Photos
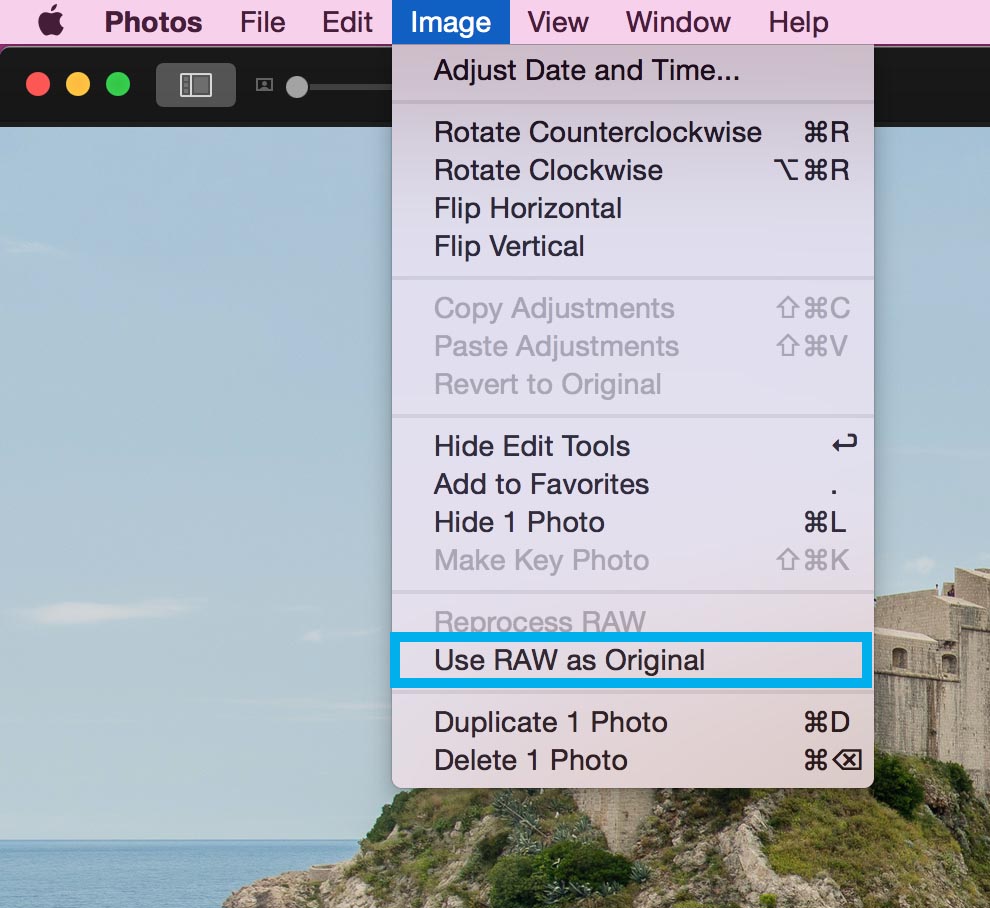
Once this is done, it is safe to import the library. Photos has some built in cleverness that will automatically recognise the duplicates and merge them together. Pictures with both a JPEG and RAW copy are given a small icon in the corner of their preview.

By default the edited JPEG version will be displayed, but selecting Image -> Use RAW as Original or Image -> Use JPEG as Original switches beween formats, providing access to the original RAW file for future editing.
For me this is a pretty good compromise. If I don’t mind losing a little quality I can apply further edits to the JPEG. If quality is important I will need to re-edit the original RAW in Photos, which is an occasional pain, but a whole lot better than either losing everything or having to rework every single photo from scratch!